For this pattern, I used 100% cotton worsted weight yarn and a 4.5mm hook. The hook is slightly larger than the weight calls for (3.5 mm – 4mm) but I like the results better. Play around with your own yarn and hook choices! Feel free to tag me on IG or FB so I can see and share your work too.
Photo tutorial, please find written steps beneath each photo prompt.
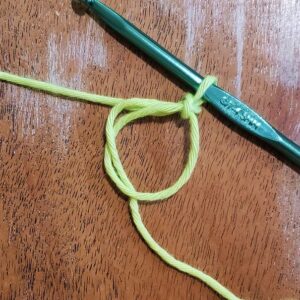
Start with an adjustable ring and pull up a loop, ch1 to lock in place.
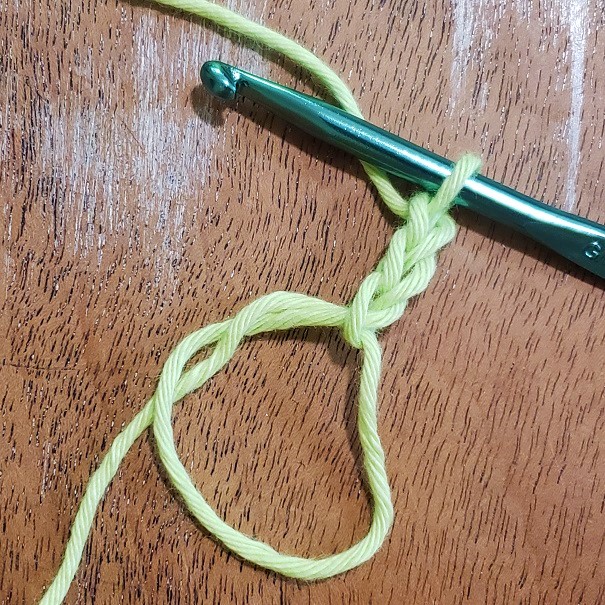
Ch 2, counts as first Dc + ch1.
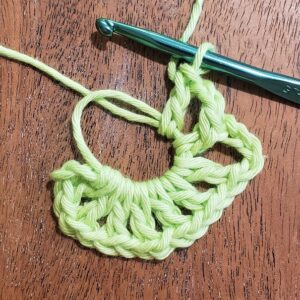
(Dc + ch1) 7x, ch3, Dc, ch2, Dc
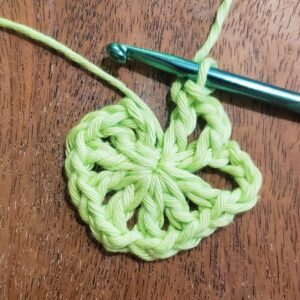
This is what it looks like with ring pulled closed.
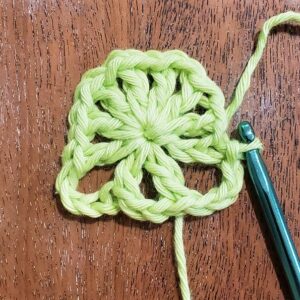
Ch3, join with slip stitch to third chain from beginning of Round.
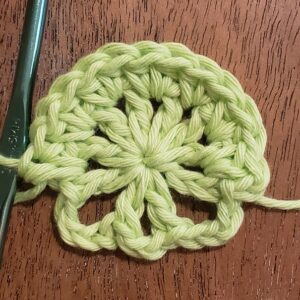
2hdc into the next 7 ch1 spaces
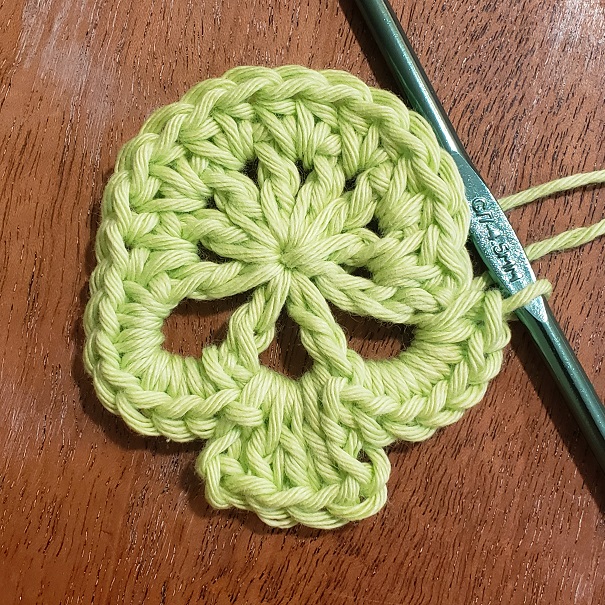
“Cheek 1”: 7 sc into ch4 space
“Teeth”: sl st into ch2 space, ch3, 3Dc into same space, ch3, sl st into space again
“Cheek 2”: 7sc into nxt ch3 space, join with sl st to hdc from beginning of Round
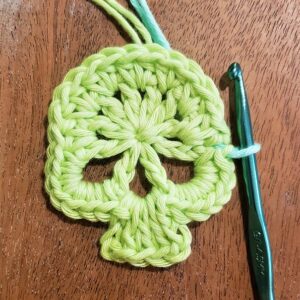
Join a new color or keep going with the same
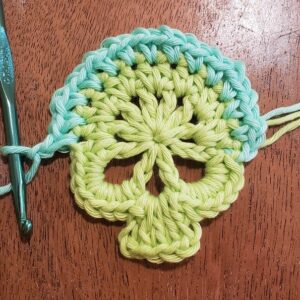
ch1, (sc + ch1 into next st) 13x
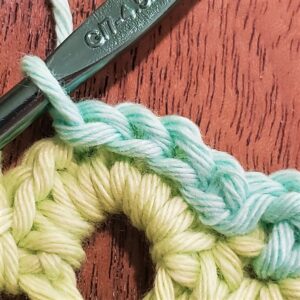
slip stitch into each of the seven sc from previous Round (see next three photos for details)
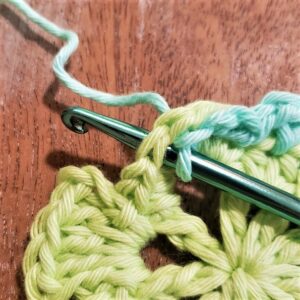
To make these overlay sl stitches, go under both loops of the sc as if you are making a regular stitch.
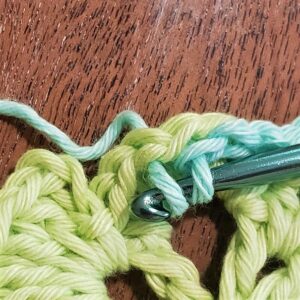
Pick up a loop and pull it through.
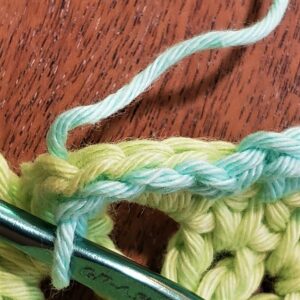
Pull loop through loop on hook like a standard slip stitch (this is a view from the side, you can see how the stitches stack on top of one another).
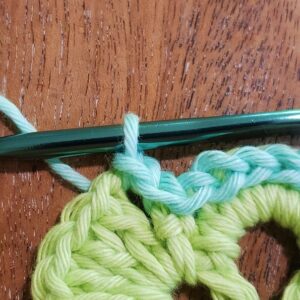
2 slip stitch into the ch3 space that makes up the first “tooth”
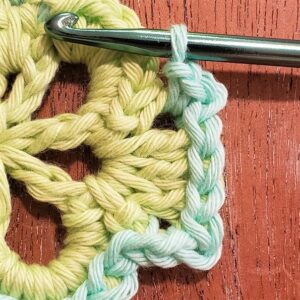
ch1, sl st into top of next 3 sts, sl st into nxt ch3 space, ch1, 2 sl sts into ch3 space. (The last slip stitch is a little tricky).
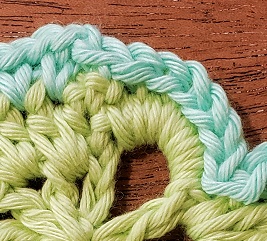
Slip stitch into top of each of the 7 sc from previous Round. (The first sc might be slightly hidden).
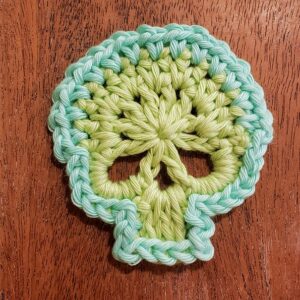
Join to beginning of round and finish off. The invisible join works great here!
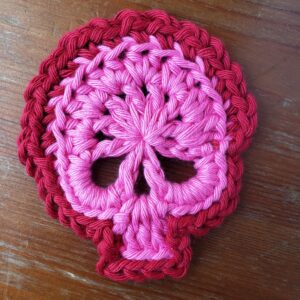
Here is an example of the pattern above with Round 3 worked into back loops only. It really defines the skull!
Options & Troubleshooting:
1-If your skull does not lay flat, you can reduce the number of “cheek” stitches on each side from 7 to 5 or 6. Alternatively, you can reduce the number of Dc + ch1 from 8 total to 7 total in the cranium. One or both of the alterations should help.
2-In Round 3, the second slip stitch in the final work around the teeth can be reduced to 1 if the second slip stitch is too tricky BUT be sure to make it long enough so it does not pull that side of the teeth short.
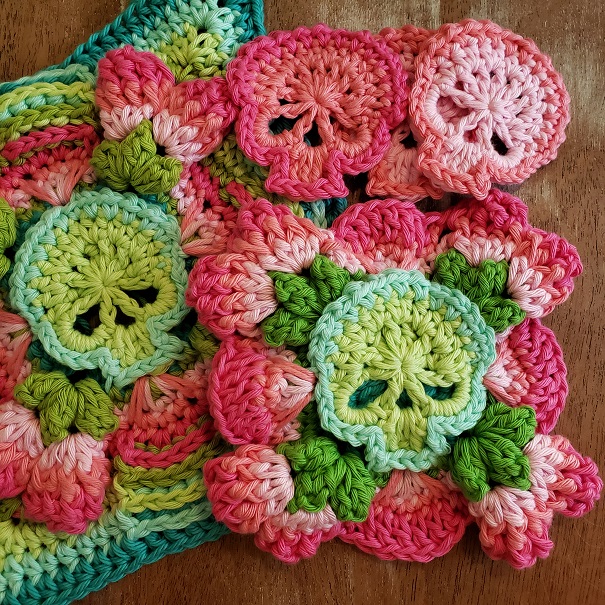
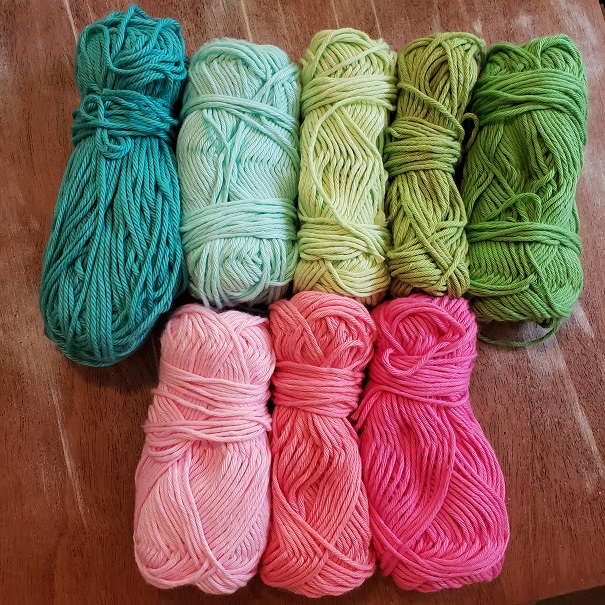

 CAL
CAL Etsy Patterns
 Ravelry
 FREE
FREE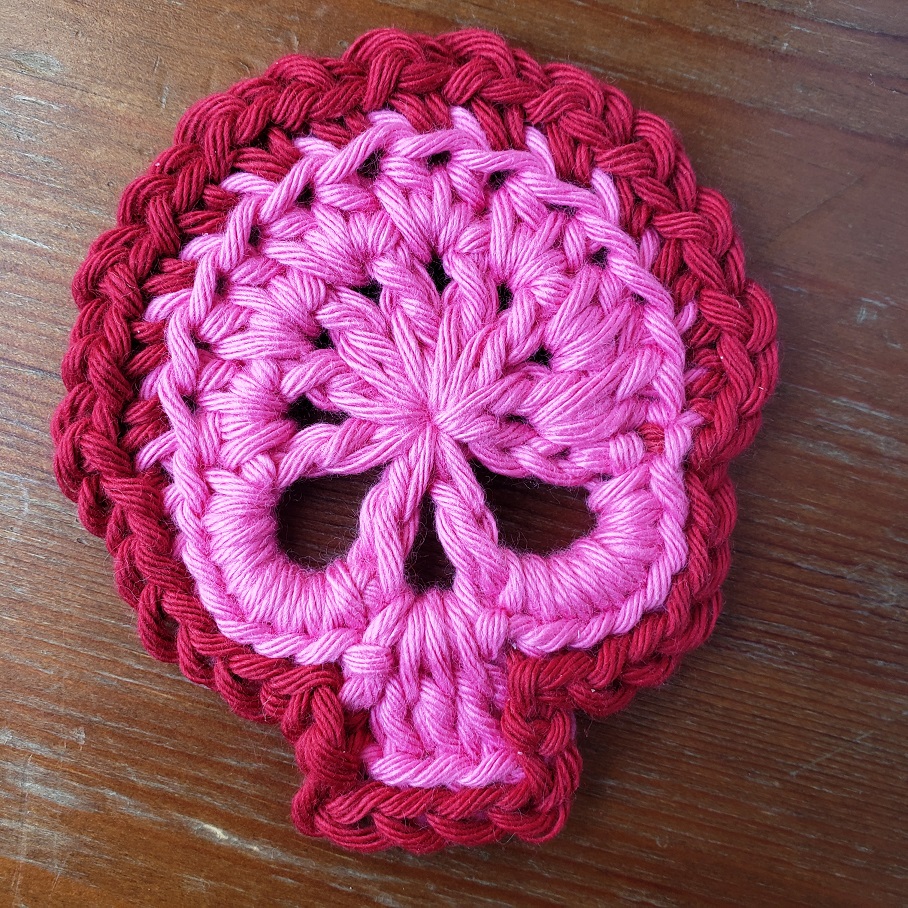


 Granny Scare Square-Croch...
  Tiny Puddle Giant Square
  Lucky Thirteen
  100gram Hue-Mongous 100% ...
  Skull Motif Madlandia Style
  Flower Puddles & Ripples Blanket
  Tiny Puddle (Part 1 of Reflections CAL)
  CAL Part 3 – Tiny Puddle Reflections
  CAL Part 2-Tiny Puddle Reflections




Can’t believe that you share a free tutorial for this beautiful pattern! Thank you so much ❤ Almost Haloween and gonna crochet some for friends =)
I hope you enjoy the pattern!
Pingback:Skull Granny Yarns & Colors – MADLANDIA
Loved this pattern it worked up beautifully. Crocheted up in #10 thread and going to make into earrings! Thank you for this pattern.
Is there also a YouTube video along with the pattern? I really love this for my daughter but sometimes I need a quick video.
Hi! I think I found a typo on the first cheek. It says to sc7 in the ch4 spot but there is only a ch3 spot. Other than that this pattern is perfect!!!
Hello Tasha thank you for your comment, that is actually intentional because when you do the joining stitch it creates more space on the last cheek. I found that if I did four stitches plus adjoining stitch that side ended up much larger than the first side.
oh okay, I get it now!! Thank you so much!!
I’m in love with this tutorial! It’s so easy to follow and the result is amazing! Thank you for sharing!
Thank you for trying it out!
I’m very much a beginner and I can’t believe I actually figured it out! Mine is a little rough, and somehow one eye is smaller than the other, but I know with some practice I can do it better. Can’t wait for the square pattern. I am definitely making a Harley themed Willie G blanket! So excited, I LOVE skulls!! Thank you for sharing your pattern and talents with a newbie like me!
I’m so glad you had success with this pattern. Keep going!
Wow!! This is so awesome looking and I can’t wait for the full square pattern to be released. Thank you for sharing!
I absolutely *love* this pattern and I am *so excited* for the full square pattern!!! I’ve made several skulls now. I am using 100% acrylic and am struggling to get the skulls to lay flat on its own; I’m hoping the square will help the skull and ultimately lay flat to build on. Again, can’t thank you enough for this delightful pattern!!!!
Thank you! If the skull is miss-shaped like a bowl that means the stitches are too tight, If the skull is curly and wavy from the center out that means the stitches are too loose. I’m sure that adjusting your tension one way or the other will create a flat motif.
Yay! That was the hope.
Such a lovely little, well written skull pattern. It works up INCREDIBLY quick.
I’m a beginner & can’t wait for the tutorial!
Love this cute little skull! Thank you.
Love this little skull! Thank you.
Thanks for the tutorial! I can’t wait for the full square pattern.
This is a beautiful pattern and a great photo tutorial. Unfortunately I am such a beginner that I can’t figure it out. Do you have a YouTube channel, or do you think you’d ever make a short video tutorial? I plan on buying the pattern for the whole square when it’s available. Take care.
I am going to make one for just the skull, but I need to work on the square pattern first.
That’s great! Thank you!
Thank you! I am also a beginner and never really learned how to follow patterns but the skull and granny squares are so cool that I’m going to learn! A video will definitely help with this adventure 🙂
Thank you for sharing the instructions for the crocheted skull. My first attempt I used plarn (plastic yarn). It turned out great. I tried to send a pic but was not successful.
Feel free to post it in my page or message it to me. I’d love to see it.
Thank you so much .. its so cute😍😍😍😍
This was so simple and easy and came out amazing. Thank you for this easy and fun tutorial.
Thank you so much for this amazing design. I love skulls 💀
I love this! I’m recovering from surgery and this will be what I work on today!
It is gorgeous!!
Thank you so much for the time you invested in creating this very detailed pattern with such wonderful pictures. I will surely test it today! 🙂
Love this pattern 💜 Thank you for sharing!
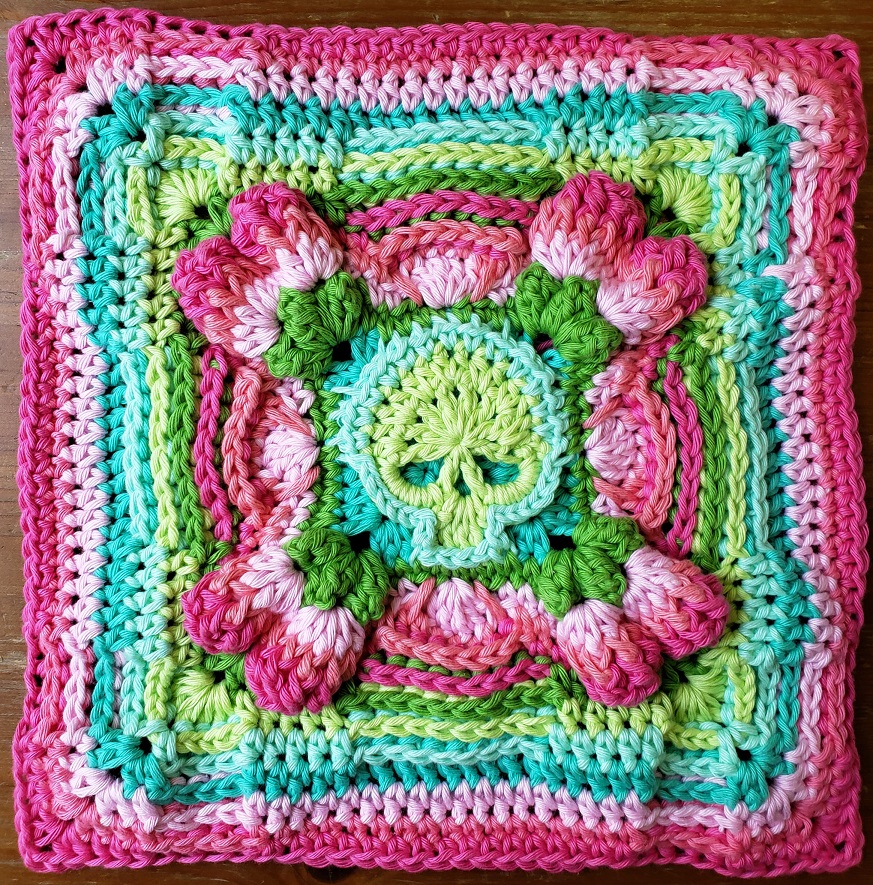
Amazing pattern! Thank you for sharing this for free. I will definitely buy the completed square pattern when you post it. The sugar skull square is gorgeous!
Thank you, that is very kind of you.
Guuurl!!! Just made my first one and I’ll tell you what – I FREAKING LOVE IT!! Thanks for the brain-to-brain communication today, these will be perfect gifts for my guildies!! Thanks again! 🥰
Mil gracias, es hermosa 😍🥳
You are welcome and thank you!
Love this thanks for the tutorial 😀 you are so kind for taking the time to share and show us how to make skulls and it also shows how fun crocheting is.
Thank you, I hope you enjoy it!
This is really cute! Thanks for the tutorial!
You are welcome! Thanks for visiting.
Do you fasten off at the end of the skull? Cause i want to start making them so im a little ahead when the granny square pattern comes out 🙂
Yes! It’s completely independent of the square.
Thank you I’ve been looking for something just like this🙂💀☠ Nice presentation!
You know what’s really funny about me loving this pattern, is I really don’t like skulls! Sugar skulls are ok because of the colors and designs, but still not my favorite. That said, I totally see myself making this into a blanket for my grandkids!
Yessssss I love this!
Love it! Can’t wait to give it a try, I see a lot of skull grannies in my future!!
This is really awesome! Thank you!
Super fun, easy peasy if you have experience. Very doable if you’re just a beginner. Congrats…..it’s a terrific pattern 💜
So cute! I’m so excited to start these
Thank you!!
Can you show us how you attach the squares around your skulls?
That will be part of the patterns to follow.
When and/or where can I find the rest of the skull granny square pattern?
I sure will it will be part of the pattern.